如何使用 xampp 在 Visual Studio Code 中运行 PHP 文件
1.安装 Visual Studio Code
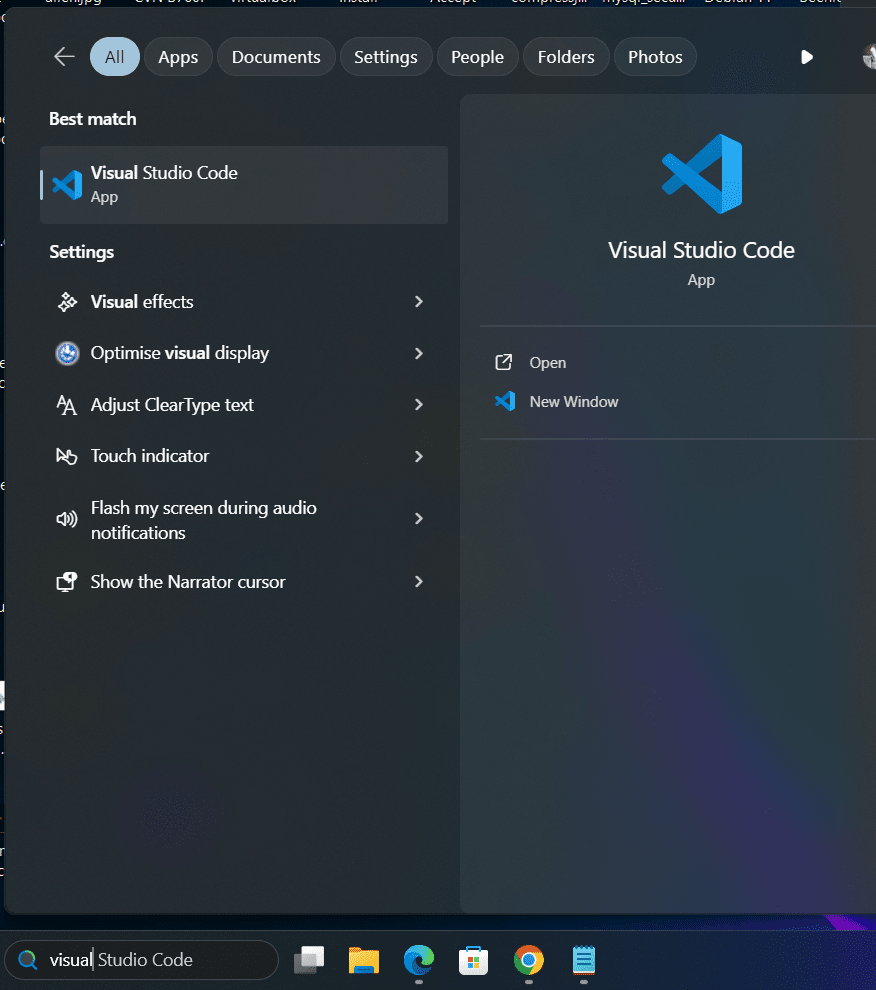
由于我们在本教程中使用 VScode 创建 PHP 文件,因此首先在您的 PC 上打开它。那些在 Windows 桌面或服务器上还没有 Visual Studio 代码的人可以访问官方网站获取安装程序。Windows 用户还可以使用命令终端和 Winget 来安装 VSCode。
2. 安装适用于 Visual Studio Code 的 PHP 扩展
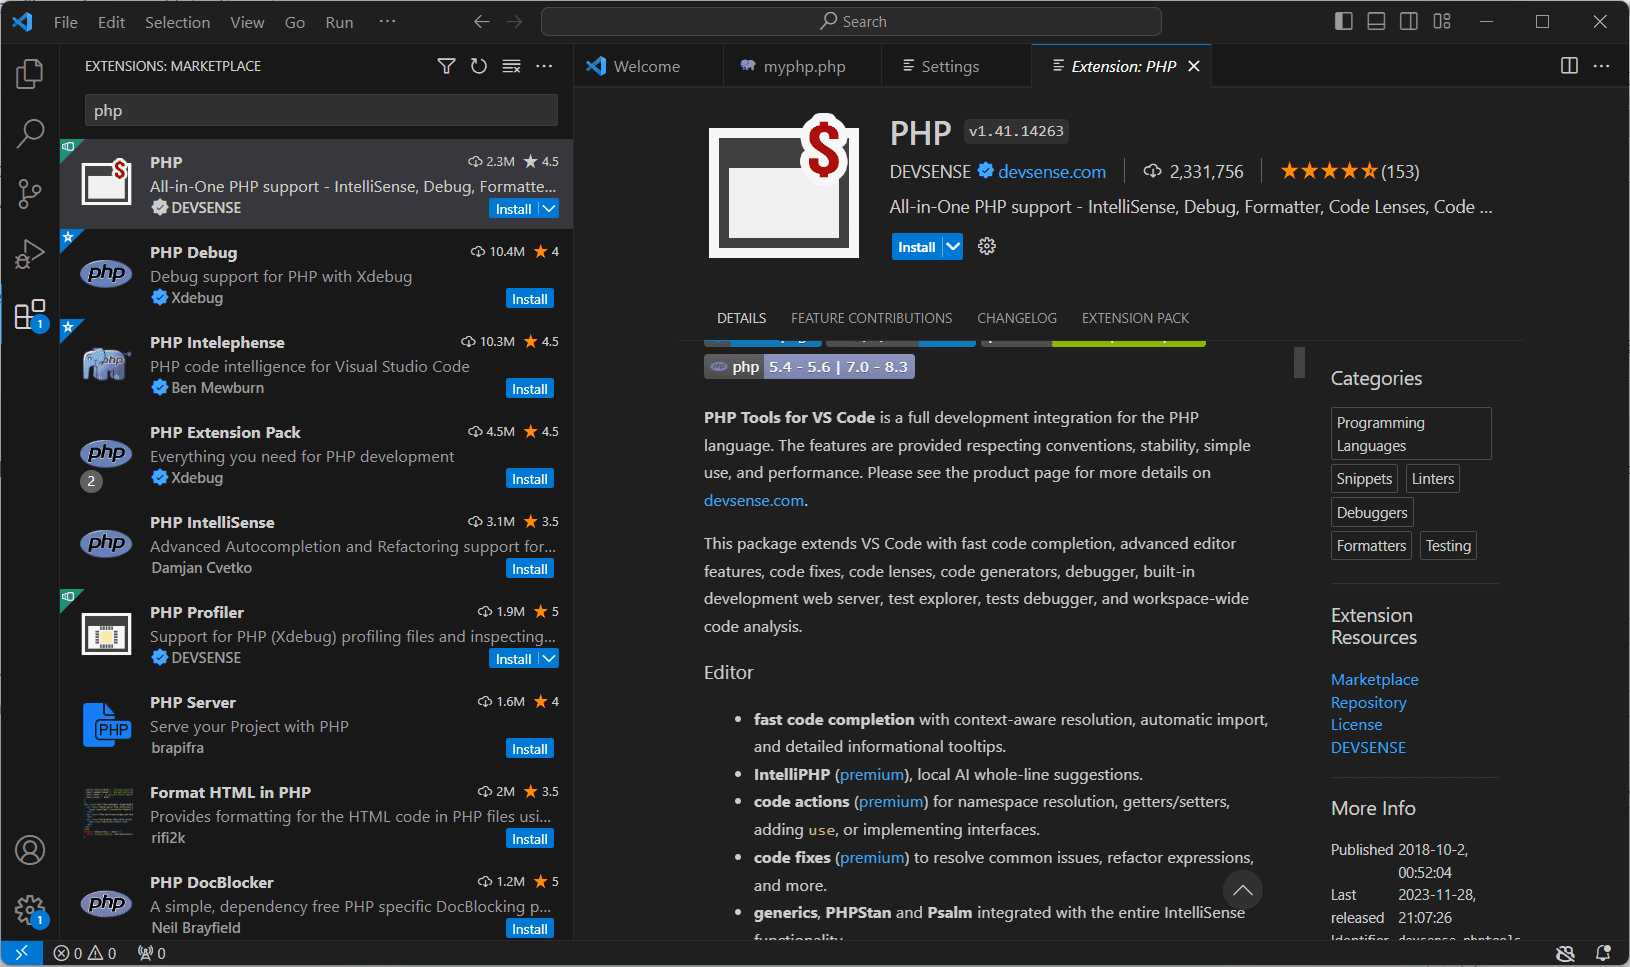
打开 VScode 后,安装 PHP 扩展。为此,请单击左侧活动栏上给出的扩展图标或使用键盘快捷键 – Ctrl+Shift+X。 在那里,在搜索框中搜索 PHP,然后选择任何流行的扩展名,例如,这里我们要使用 DEVSENSE 的 PHP。单击“安装”按钮以获取它。
该扩展将帮助我们有效地编写PHP代码,并在出现错误时进行调试。
3. 安装 XAMPP
XAMPP 是一款免费但非常有用的软件,适用于希望在其 PC 上使用 Apache、MySQL 和 PHP Web 服务器环境来测试 Web 应用程序的 Windows 用户。因此,若要运行或测试在 Visual Code Studio 中创建的 PHP 文件,请安装 XAMPP。如果您已经拥有它,那么可以进一步移动,否则请访问 XAMPP 的官方网站进行设置。
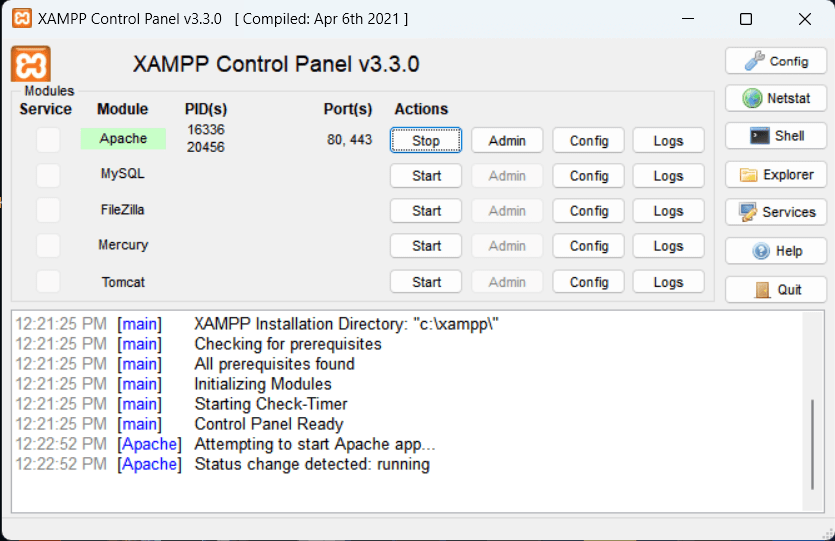
打开 XAMPP 控制面板后,启动 APACHE Web 服务器,因为我们需要它在浏览器中查看 PHP 文件。
4. 创建项目文件夹
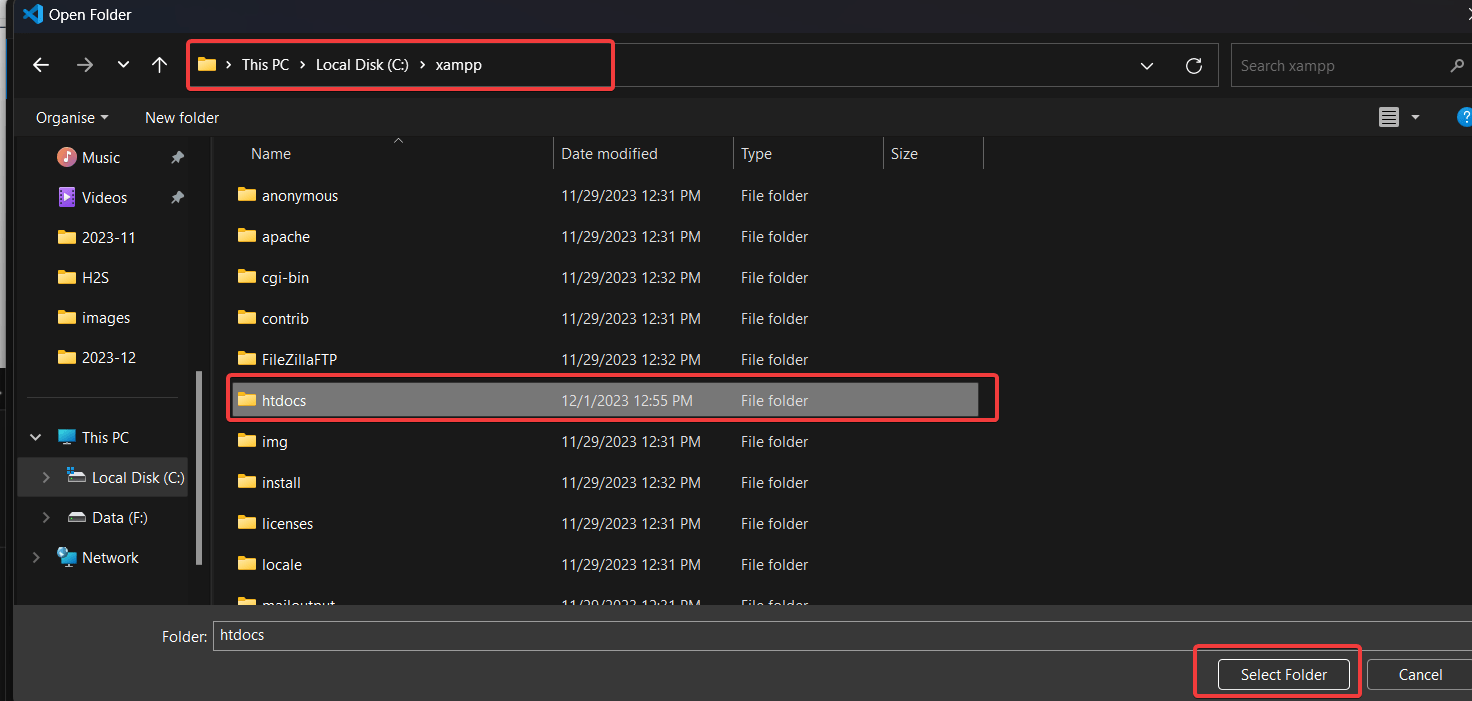
现在,让我们使用 Visual Code Studio 并在 XAMPP 的 htdocs 中创建项目文件夹。对于打开的VScode,单击“文件”菜单,然后选择“打开文件夹”选项或使用键盘快捷键Ctrl + K。
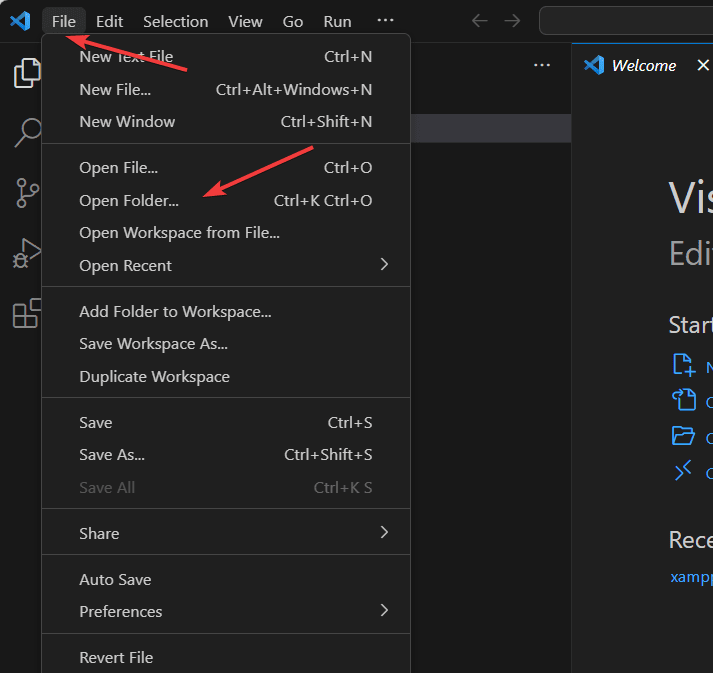
导航到 C:/Xampp/htdocs,然后单击“选择文件夹”按钮。
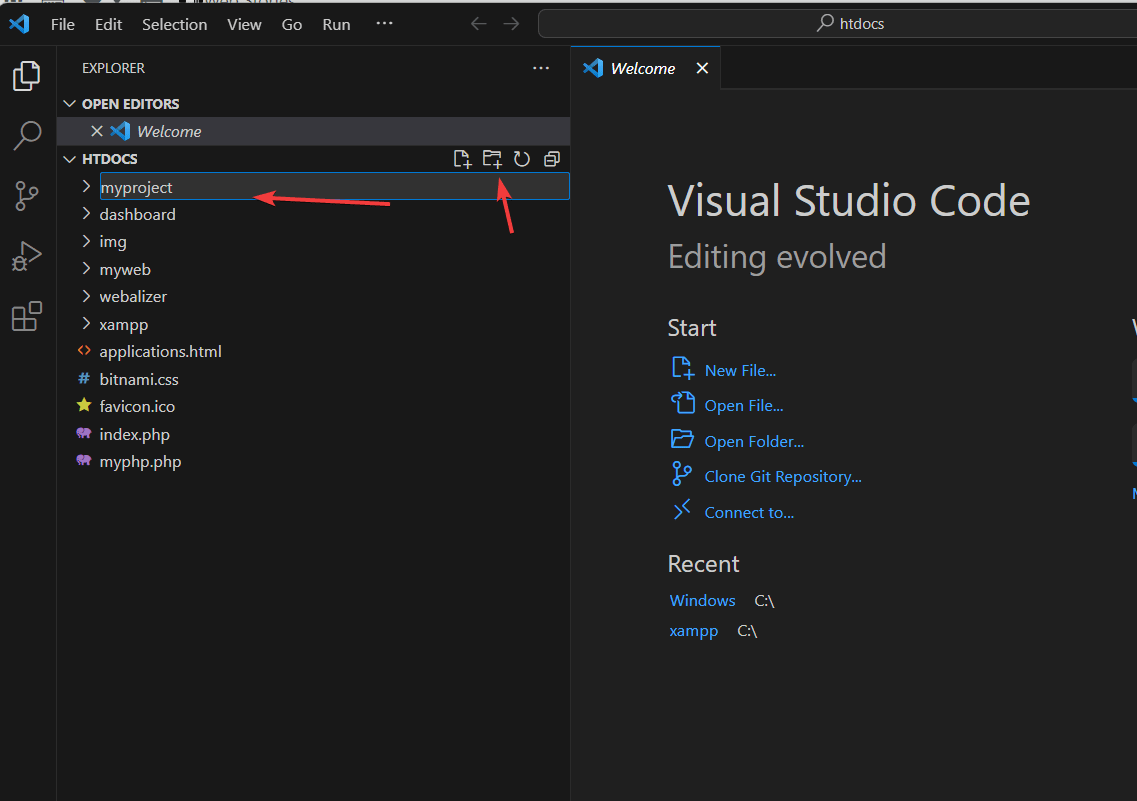
现在,单击文件夹图标并为您的项目文件夹命名。
5. 创建一个 PHP 文件:
创建项目文件夹后,选择它并单击文件图标以创建一个具有您想要的任何名称以及“.php”扩展名的 PHP 文件。 例如,这里我们正在创建一个文件“myfirstphp.php”文件。
编写 PHP 代码或将其复制粘贴到文件中。保存文件 – Ctrl+S。
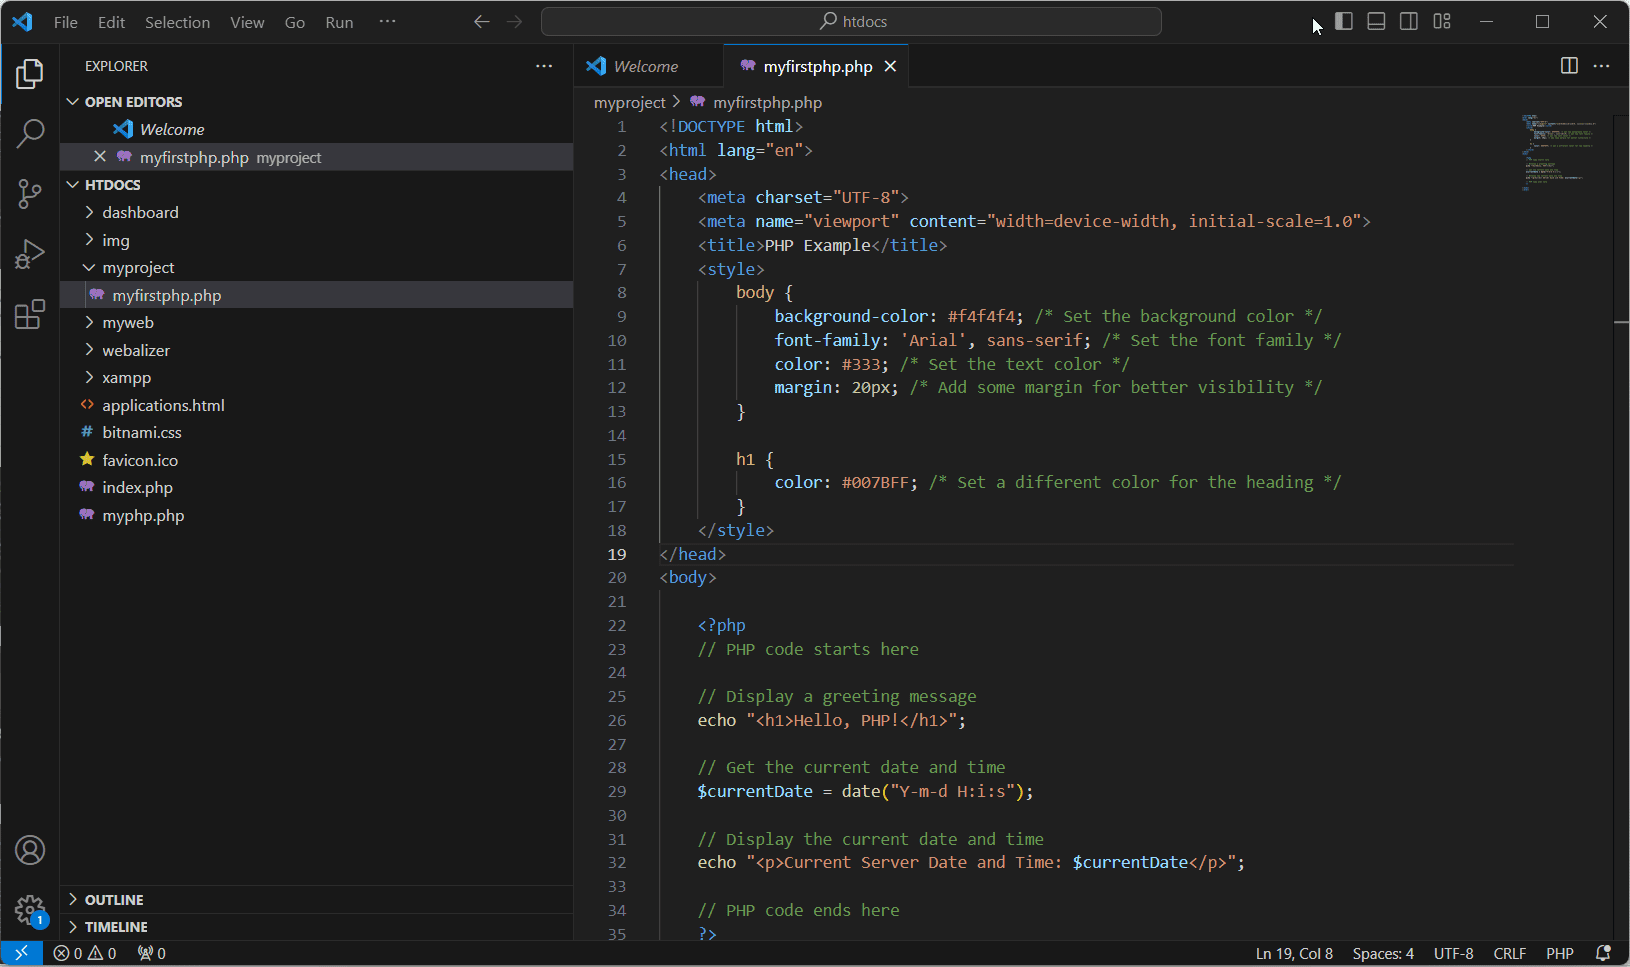
我们使用的代码在这里,以备不时之需:
 <!DOCTYPE html>
<html lang="en">
<head>
    <meta charset="UTF-8">
    <meta name="viewport" content="width=device-width, initial-scale=1.0">
    <title>PHP Example</title>
    <style>
        body {
            background-color: #f4f4f4; /* Set the background color */
            font-family: 'Arial', sans-serif; /* Set the font family */
            color: #333; /* Set the text color */
            margin: 20px; /* Add some margin for better visibility */
        }

        h1 {
            color: #007BFF; /* Set a different color for the heading */
        }
    </style>
</head>
<body>

    <?php
    // PHP code starts here

    // Display a greeting message
    echo "<h1>Hello, PHP!</h1>";

    // Get the current date and time
    $currentDate = date("Y-m-d H:i:s");

    // Display the current date and time
    echo "<p>Current Server Date and Time: $currentDate</p>";

    // PHP code ends here
    ?>

</body>
</html>
6. 运行PHP文件
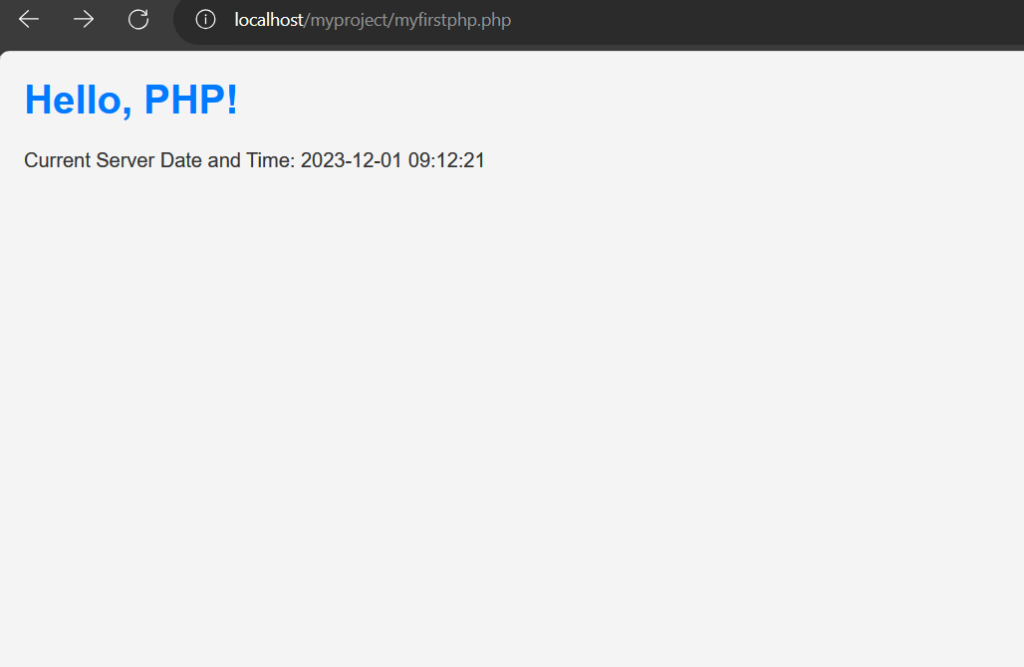
现在,我们已准备好在 Visual Code Studio 中创建的 PHP 文件。要运行和测试它,请打开系统 Web 浏览器并导航到 http://localhost/project-folder/your-file-name.php。 例如,我们的PHP文件名是“myfirstphp.php”,因此访问它的URL将如下所示:
http://localhost/myproject/myfirstphp.php您应该会在浏览器中看到 PHP 代码的输出。
调试 PHP(可选)
Visual Studio Code 还支持调试 PHP 代码;通过单击行号旁边的装订线,在 PHP 代码中设置断点。按 F5 或转到“运行”菜单并选择“开始调试”。您可以使用调试控制台来检查变量并单步执行 PHP 代码。